Sri Lankan roast paan(Bread recipe)).
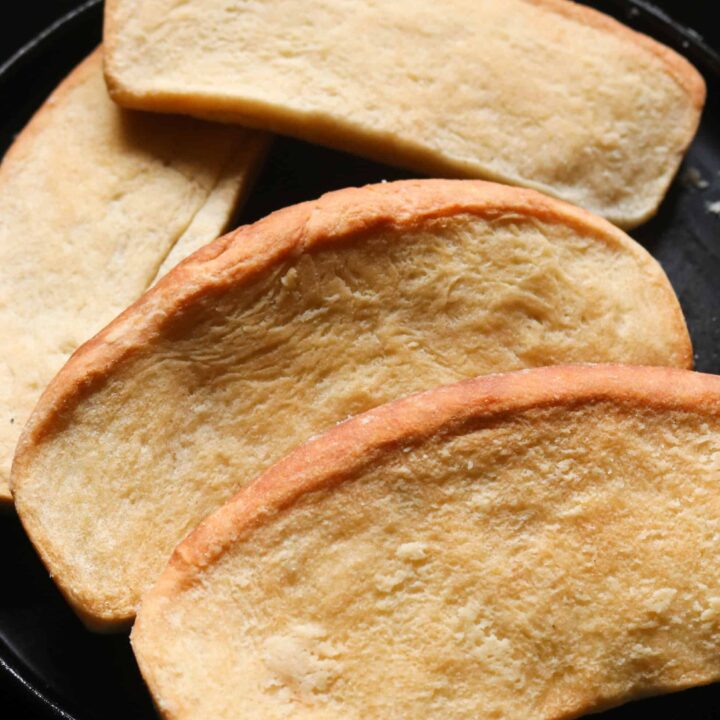
Roast paan also known as “Thati paan” in Sinhalese is a Sri Lankan bread variety. Popular for its crust, extra crispy texture and flat shape, this type of bread is made by local bakeries.
- Prep time
- 3 hr
- Cook time
- 45 min
- Yield
- 4 servings
- Difficulty
- MEDIUM
Ingredients
Quantities are shown as originally provided.
- Ingredients to make roast paan.
- 2 and 1/2 cups of flour
- 1/2 teaspoon of salt
- 1/4 cup of water(to activate the yeast)
- 2 teaspoons of sugar
- 2 teaspoons of active yeast
- 1 cup of water + 2 tablespoons of water
- 2 and 1/4 teaspoon of oil to be used as needed(to oil the bowl and add to the dough mix).
- 1/2 a cup of flour to help with the kneading
- Ingredients to make the flour and oil mix
- 3 tablespoons of flour
- 4 tablespoons of oil
- 3 tablespoons of butter to toast the sides of the bread.
Instructions
- 1
Warm 1/4 cup of water for 15 seconds in your microwave.
- 2
Add 2 teaspoons of sugar, and dissolve.
- 3
Add 2 teaspoons of yeast to the water. Mix with a spoon, cover and let the yeast bloom.
- 4
This should take 3-5 minutes.
- 5
The yeast mixture should be frothy, which shows the yeast is well and active.
- 6
While the yeast activates, follow the next step.
- 7
Add 2 and 1/2 cups of flour into a bowl, followed by salt(1/2 teaspoon).
- 8
Combine well with a spoon for 10 seconds.
- 9
Check on your yeast; when it’s frothy, follow the next step.
- 10
To the flour, gradually add 1 cup of water and mix with a spoon for a few seconds.
- 11
Add the frothy yeast mixture to the flour and lightly combine for 10 seconds.
- 12
Add 2 teaspoons of oil.
- 13
If you notice the flour is still dry, add 2-3 tablespoons of water to hydrate the flour mixture.
- 14
Use your fingertips to lightly press and combine the flour mix.
- 15
Cover and leave for approximately 15 minutes.
- 16
Lightly oil a bowl(1/4 teaspoon). set aside.
- 17
Once 15 minutes of hydration are over, gently add the semi-wet dough onto the board.
- 18
Use your fingertips to lightly press and spread the dough.
- 19
Sprinkle some flour over the dough mix.
- 20
Lightly flour your hands and begin your kneading of the dough.
- 21
Use a folding and rolling motion to knead the dough.
- 22
You will have to add flour to knead the dough and flour your hands from time to time.
- 23
7-10 minutes of gentle but firm kneading(refer to tips on kneading)will turn your dough firm and smooth.
- 24
Press a floured fingertip on the dough; if it bounces back, your dough is ready for its first rise.
- 25
Lightly flour the dough ball. Place the dough in the oiled bowl.
- 26
Cover with clingfilm or a cloth serviette, set aside in a warm place to proof for 1 hour and 30 minutes.
- 27
While the dough rises, prepare the oil-flour mix and loaf pan.
- 28
Add 3 tablespoons of flour and four tablespoons of oil into a bowl.
- 29
Mix until you have a smooth and loose paste. set aside.
- 30
Cover the bottom of the loaf pan with parchment/baking paper.
- 31
Brush the oil-flour mix generously, cover to avoid drying and set aside.
- 32
Once the proofing(rising)is done, gently press down on the dough to deflate it.
- 33
Flour the kneading surface and transfer the dough onto the board.
- 34
Gently roll the dough into a firm ball.
- 35
Cut the dough in half and then into four.
- 36
Roll them into smooth balls and immediately place them on a platter and cover them.
- 37
Place the loaf pan in front of you so you can judge the size you want to roll the dough into.
- 38
Use your rolling pin to make a flat oval shape that is thicker in the middle. Use the image below as a guide.
- 39
Fold the oval-shaped dough to make a half-moon shape and pinch the edges(refer to the image below)
- 40
Use your rolling pin to straighten the curved edges to fit the loaf pan(refer to the image below)
- 41
Brush the loaf pan side again with the oil and flour mix and place the first shaped dough.
- 42
Brush the paste on the dough facing up.
- 43
Rest the loaf pan on its side; this makes it easy to layer the shaped dough on each other
- 44
Then continue to brush the flour-oil mix in between the shaped dough as you layer them on the pan.
- 45
Right the pan to its standing position, you’ll notice a gap; this gap should be adjusted for the bread to rise.
- 46
We do this by just adjusting the shaped dough to fit the pan while giving space in between to expand.
- 47
Just go between the dough pieces, holding them like clothing to be hung on a line and adjust.
- 48
Cover with a large domed bowl or a kitchen towel and let it rise for the second time for 30 minutes.
- 49
Preheat oven to 200°C.
- 50
Place the loaf pan in the oven and add an oven-proof dish filled with water. You can use a foil or aluminium cup for this purpose.
- 51
Bake the bread for 30 minutes at 200°C.
- 52
Once the bread is baked, gently invert the bread onto a platter using oven mittens.
- 53
Spread them on the baking pan and brush some butter on one side of the bread.
- 54
Use the grill mode for 13-15 minutes to brown the bread on one side. Do the same on the other side.
- 55
Remove the toasted flatbreads and serve while warm. Serving ideas are given above.