Milk Bread (Soft and Fluffy Asian Style)
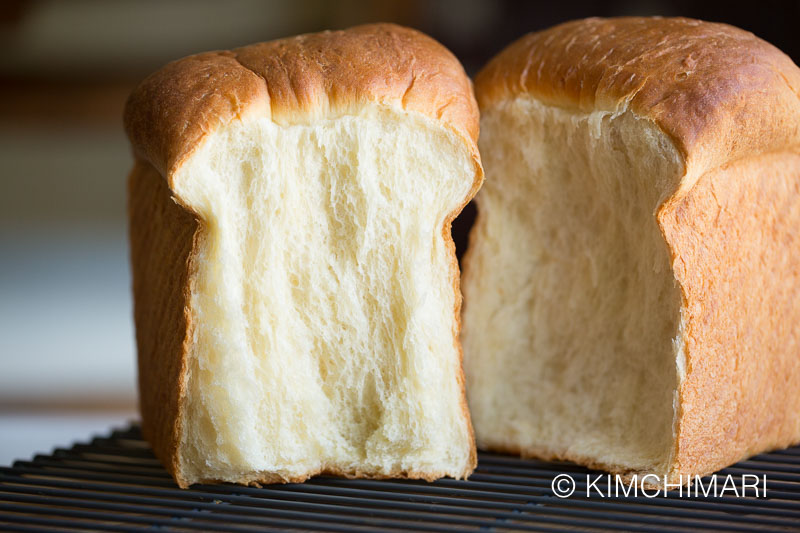
Also called Japanese Milk Bread, this milk bread is made very differently and is very moist and also has a light, fluffy and slightly chewy texture.
- Prep time
- 30 min
- Cook time
- 1 hr
- Yield
- 1 serving
- Difficulty
- MEDIUM
Ingredients
Quantities are shown as originally provided.
- 22 g unbleached bread flour ((22g = 2.5 Tbsp))
- ¼ cup water
- ¼ cup 2% low fat milk ((can also use whole milk))
- 330 g unbleached bread flour ((330g = 2 ½ cups))
- 7 g instant yeast ((7g = 1 packet = 2 tsp))
- 1 tsp salt
- 50 g sugar ((50g = 3.5 Tbsp))
- ½ cup 2% low fat milk ((warmed, plus a little extra for top of loaf))
- 1 egg
- 60 g unsalted butter ((room temp, cut into small pieces 60g = 4 Tbsp))
- 1 Tbsp unsalted butter ((for bowls and pan))
Instructions
- 1
Bring egg and butter to room temperature or soften 60 g unsalted butter in the microwave (like 30 sec at 30% power for 4 Tbs).
- 2
Make Starter
- 3
In a small sauce pot, add 22 g unbleached bread flour, ¼ cup 2% low fat milk, ¼ cup water and whisk. Turn heat to medium and cook for 2-3 minutes for this minimum amount (longer if you are making more than 1 loaf). For the first 1-2 minutes, check every 10-15 seconds and whisk. After 2 minutes, as it starts to thicken, whisk constantly until everything is cooked and thickened. When it is done, whisking should leave tracks on the bottom of the pot and hold its shape like below.
- 4
Make Dough
- 5
In a stand mixer bowl (using a dough hook), add 330 g unbleached bread flour 50 g sugar, 7 g instant yeast, 1 tsp salt. Mix the dry ingredients with the dough hook for a few seconds until they are evenly combined. When done, I also like to use my hands to mix again just to make sure things are evenly mixed including the bottom of the bowl.
- 6
Warm up ½ cup 2% low fat milk in a pot or in the microwave - until it feels like very warm bath water (110° F/43° C).
- 7
To mixer bowl with dry ingredients, add warm milk, starter and 1 egg. Turn the mixer on low speed and knead for 5 minutes.
- 8
Use 1 Tbsp unsalted butter to butter your loaf pan and butter two bowls where the dough will be proved. One should be large enough to hold more than double size of the dough.
- 9
Add softened 60 g unsalted butter to the dough from 5 and knead for 10 - 11 minutes. First at medium-low speed for a couple of minutes and then at medium speed until dough becomes smooth and stretchy but a little tacky. See video.
- 10
Prove Dough
- 11
Transfer the dough with your hands to the buttered bowl from 6. See how smooth it looks in the mixing bowl but also how sticky it is - sticking to the side of the bowl.
- 12
Shape it a bit with your hands to make it into a ball. Cover with a plastic wrap or with a kitchen towel and let it rise in a warm location for 40 to 60 minutes or until it has doubled in size. Here's before -
- 13
And after it has proved
- 14
Uncover the dough and punch it down with your fist. Divide dough in two and scoop out half of the dough. Form the dough lightly into a ball and then put it into the 2nd bowl. Scoop out the remaining dough and form it into a ball again with the seam side down and put it back in the bowl.
- 15
Cover both bowls with dough with a plastic wrap or kitchen towel and let it rise again (in a warm location) for 15 - 17 minutes.
- 16
Once dough has risen, transfer one dough on a smooth surface (granite or marble works well), sprinkle surface very lightly with flour and also the rolling pin. This is how it looks when properly proved and pulled from the sides.
- 17
Roll out one dough ball into a thick rectangle (or oval) about 12 inches long and 4-5 inches wide.
- 18
Fold or roll the top of the dough (like 3 inches) down and then fold the bottom up about the same amount, resulting in a square-like dough shape. Then roll it into a log, starting from the right edge of the square. Pick up the log and nestle it down near one end of the loaf pan. REPEAT with the other dough ball and place it at the other end of the loaf pan.
- 19
Cover the loaf pan and let it rise again for 30 to 40 minutes until the dough is visible above the edge of the pan and the 2 dough logs have fully filled up the pan.
- 20
Heat oven to 350°F/175° C.
- 21
Bake - at 350°F/175° C.
- 22
Optionally, brush the tops lightly with milk (for shine) and bake on the bottom shelf of the oven (you probably will need to take out a shelf since this bread will rise quite a bit during baking) until golden brown about 32-35 minutes. Bake a little longer if you pierce it with a toothpick (in the lowest part) and it doesn't come out clean.
- 23
Let the milk bread cool in the pan for 10-15 minutes and then take the bread out of the pan onto a wire rack and let it cool for at least an hour or more before slicing because if you slice too soon when it's still warm, the bread may collapse!