No Bake Raspberry Cheesecake
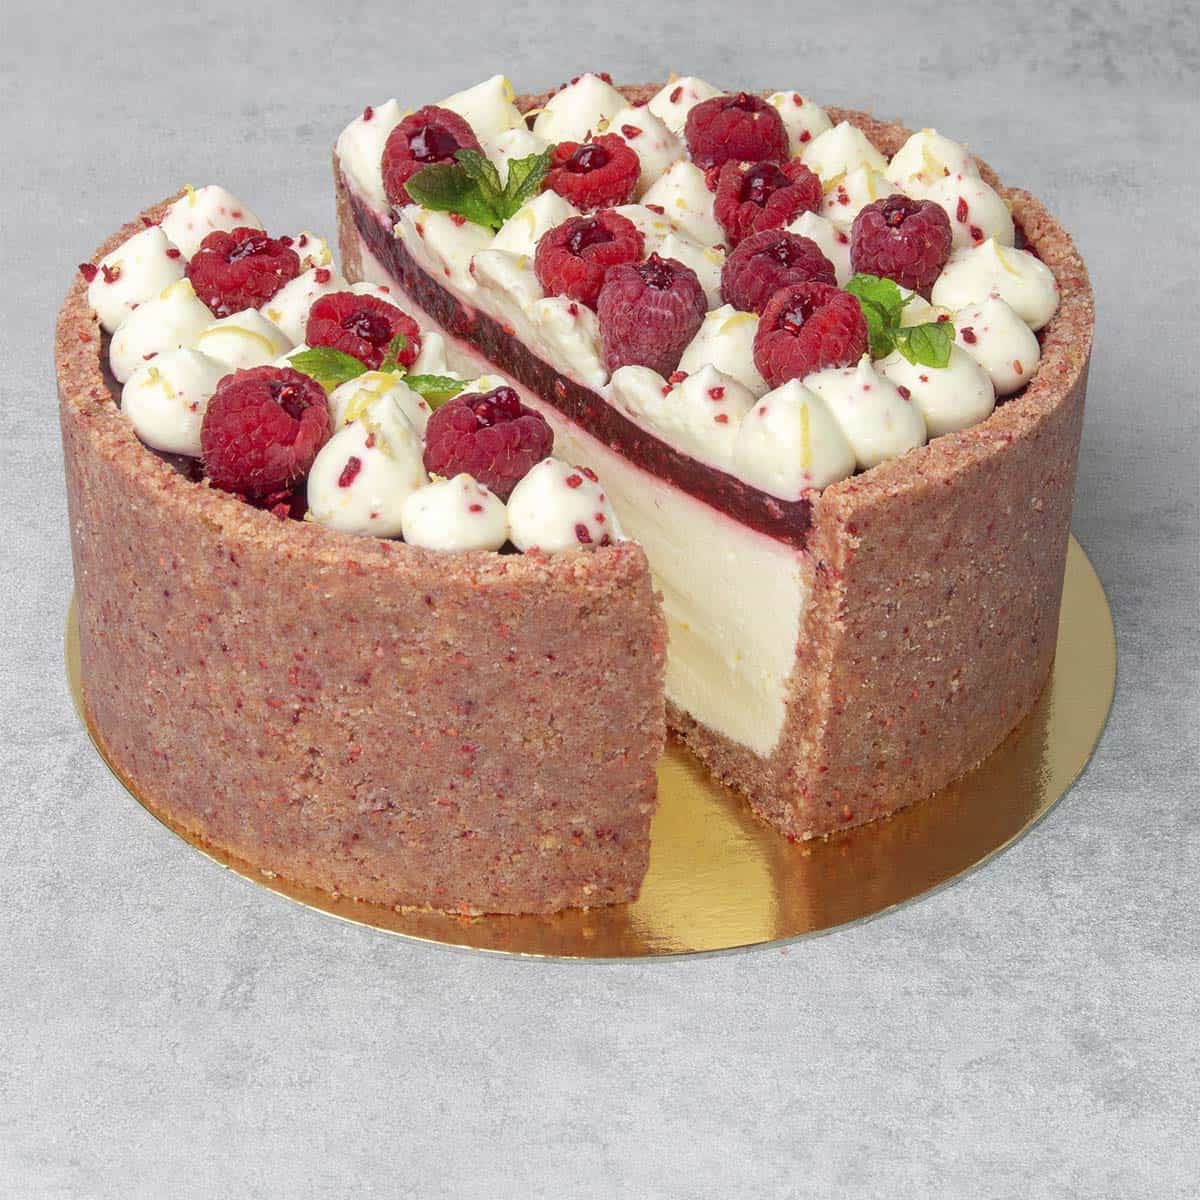
Rich and creamy filling meets raspberry compote and crunchy crust in this delicious No Bake Raspberry Cheesecake. It's the ultimate in luxurious taste.
- Prep time
- --
- Cook time
- 1 hr
- Yield
- 8 servings
- Difficulty
- MEDIUM
Ingredients
Quantities are shown as originally provided.
- 140 g Unsalted butter
- 280 g Biscuit crumb (e.g., Graham Crackers or Digestive Biscuits.)
- 20 g Freeze-dried raspberries
- Pinch of salt
- 3 Gelatine sheet (1 gelatin sheet is 1.7g, can be replaced with an equal amount of gelatin powder)
- 90 g Heavy Cream (36% fat)
- 100 g Granulated sugar
- 65 g Lemon juice (Freshly squeezed)
- 300 g Cream cheese (e.g., Philadelphia full fat)
- 270 ml Heavy Cream (36% fat, use it cold)
- 400 g Raspberry puree (Measure after sieving out the majority of the seeds)
- 100 g Granulated sugar (Adjust according to the sweetness of your fruit.)
- 20 g Lemon juice (Freshly squeezed)
- 2.5 Gelatin sheets (1 gelatin sheet is 1.7g, can be replaced with an equal amount of gelatin powder)
Instructions
- 1
For the cheesecake crust that is flavored with raspberry
- 2
Melt the butter in the microwave and allow it to cool slightly while preparing the biscuit crumbs.
- 3
Make the biscuit crumbs either by pulsing them in a food processor with the freeze-dried raspberries or by placing both ingredients into a ziplock bag and crushing them with a rolling pin.
- 4
Mix the crumb mixture with the warm melted butter and a pinch of salt until it comes together.
- 5
Press the crumb mixture into a springform pan or Mousse cake ring (adjustable in size) set to 16cm / 6 inches, starting with the sides before moving to the base. Place it into the freezer while preparing the filling.
- 6
For the cheesecake part
- 7
Soak the gelatin sheets in cold water for a few minutes.
- 8
Heat the smaller amount of heavy cream (90g) with sugar, stirring until the sugar dissolves, and bring to a simmer.
- 9
Squeeze out the excess water from the gelatin, stir into the cream mixture, and then stir in lemon juice. Remove from the heat and allow the gelatin mixture to come down to room temperature.
- 10
In a mixing bowl, beat cream cheese with an Electric hand mixer until light and fluffy, then fold in the heavy cream and gelatin mixture with the help of a Rubber spatula.
- 11
In a separate bowl, whip the other heavy cream until it has soft peaks and very gently, fold it into the cream cheese mixture using a Rubber spatula.
- 12
Pour or pipe the filling into the cheesecake crust, leaving a small gap at the top for the raspberry topping. Smooth the surface with an Offset spatula. Place it into the fridge for 1-2 hours or until the filling sets.
- 13
Set some of the filling aside to decorate the cheesecake in a bowl covered with plastic wrap, and refrigerate.
- 14
For the raspberry topping
- 15
Mash the raspberries with a fork and push the puree through a sieve to remove the majority of the seeds before measuring the quantity.
- 16
Soak the gelatin sheets in cold water for a few minutes. Cook the sieved raspberry puree, sugar, and lemon juice in a saucepan on the stove for about 10 minutes until the mixture thickens slightly.
- 17
Squeeze the excess water from the softened gelatin sheet and stir it into the warm fruit mixture. Let the raspberry cheesecake topping cool to room temperature before pouring it on top of the cheesecake.
- 18
Leave the cheesecake with the topping to set in the fridge for a minimum of 4 hours.
- 19
Decoration
- 20
Once the cheesecake has set, very carefully remove the ring/springform.
- 21
Decorate according to your preference with the remaining cream cheese filling, fresh raspberries, and raspberry compote. Grate over some lemon zest and garnish with mint leaves before sering.
- 22
Store the cheesecake in fridge.