The Flakiest All-Butter Pie Crust
Forget everything you know about pie crust making! This recipe uses an unconventional mixing method, to create the flakiest, most flavorful all-butter pie crust, that is a breeze to roll out, without the use of unusual ingredients. It's a game-changer!
- Prep time
- 30 min
- Cook time
- 30 min
- Yield
- 9 servings
- Difficulty
- HARD
Ingredients
Quantities are shown as originally provided.
- 10 tablespoons (5oz/ 142g) unsalted butter, chilled
- 1 ¼ cups (6 1/4oz/ 177g) all-purpose flour (must be weighed*)
- 1 tablespoon (1/2oz/ 13g) granulated sugar
- ½ teaspoon salt
- ¼ cup (60ml) ice water
Instructions
- 1
Grate 2 tablespoons (1oz/ 28g) of the butter on the large holes of a box grater and place in the freezer until solid. Cut remaining 8 tablespoons (4oz/ 114g) of butter into ½-inch cubes.
- 2
In the work bowl of a food processor, combine together ¾ cup (3 3/4oz/ 106g) of the flour, sugar, and salt and pulse a few times to incorporate. Add the cubed butter and process until a homogeneous paste forms, about 30 seconds.
- 3
Using your hands, carefully break the paste into 2-inch chunks and redistribute evenly around the processor blade. Add the remaining ½ cup (2 1/2oz/ 71g) of flour and pulse 4 to 5 times, until the mixture is broken into pieces that are no larger than 1-inch (most pieces will be much smaller).
- 4
Transfer the mixture to a medium bowl. Add the frozen grated butter and toss until the butter pieces are separated and coated with the flour. Be sure to work quickly, as to not let the warmth of your hands melt the butter.
- 5
Sprinkle 2 tablespoons of the ice water over the mixture. Using a rubber spatula, gently toss until the mixture is evenly moistened. Sprinkle remaining 2 tablespoons ice water over the mixture and toss to combine. Press dough with the spatula until dough sticks together. Dough will be sticky like cookie dough and much more moist than most pie doughs, but as it chills it will absorb a lot of excess moisture.
- 6
Transfer dough to a sheet of plastic wrap and use it's edges to press firmly on the sides and top to form a neat 5-inch disk. Wrap well and refrigerate dough for at least 2 hours or up to 2 days. Let chilled dough sit on counter to soften slightly, about 5 to 10 minutes, before rolling. (Wrapped dough can be frozen for up to 1 month. If frozen, let dough thaw completely on counter before rolling.)
- 7
On a well floured counter, use a rolling pin to roll the dough into a 12-inch circle. To transfer it to the pie dish, roll the dough loosely around the rolling pin and unroll it onto a 9-inch pie dish, leaving at least 1-inch overhang around the edges. Ease dough into the dish by gently lifting edge of the dough with your hand while pressing into plate bottom with your other hand.
- 8
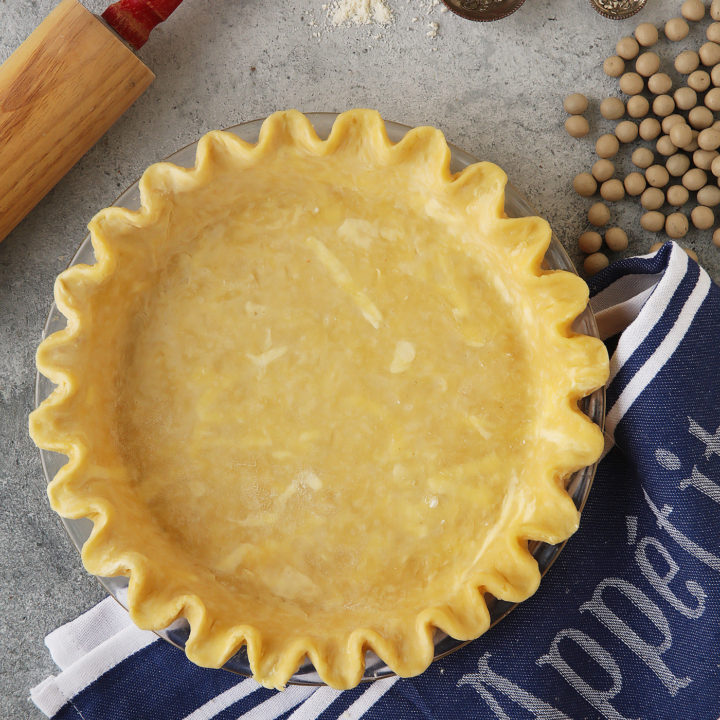
If needed, trim overhang to 1/2 inch beyond lip of the dish. Tuck overhang under itself; folded edge should be flush with edge of plate. Use your fingers to crimp dough edges around the dish. Refrigerate dough‑lined plate until firm, at least 30 minutes. Fill and bake as per individual recipes instructions or bake for a parbaked or fully baked crust as per instruction below.
- 9
Adjust oven rack to middle position and heat oven to 180C/ 350F.
- 10
Line chilled pie shell with aluminum foil, covering edges to prevent burning, and fill with pie weights or beans/rice/sugar.
- 11
Bake until edges are set and just beginning to turn golden, but the center will remain pale, 15 to 20 minutes. Remove foil and weights, rotate plate, and continue to bake about 10 to 15 minutes longer or until lightly golden for a partially baked crust. For a fully baked crust, bake until golden brown and crisp,15 to 20 minutes longer. If crust begins to puff, pierce gently with the tip of a paring knife.
- 12
Proceed with specific pie recipe or let crust cool completely in the dish on wire rack, about 30 minutes.