Pumpkin Mochi with Red Bean Filling (红豆南瓜饼)
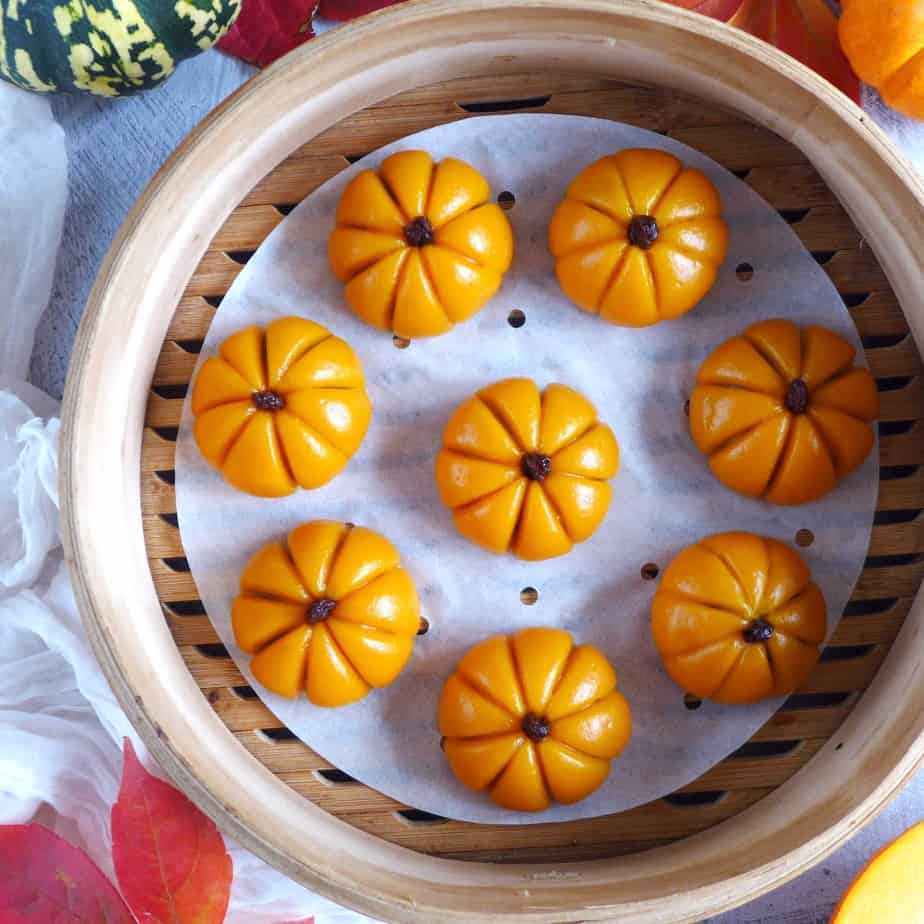
Soft, gooey, sweet and nutty, pumpkin mochi cake with red bean filling shows you a delectable and fun way to enjoy autumn produce.
- Prep time
- 30 min
- Cook time
- 2 hr
- Yield
- 16 servings
- Difficulty
- HARD
Ingredients
Quantities are shown as originally provided.
- 150 g adzuki beans (aka red beans/红豆) (or 350g canned ones)
- 2 tablespoon white sugar
- 1 tablespoon dark brown sugar
- 80 g butter (See note 1 for vegan option)
- 350 g butternut squash ( or canned pumpkin puree, see note 2)
- 1 tablespoon white sugar
- 1 tablespoon neutral cooking oil
- 320 g glutinous rice flour (aka sweet rice flour/糯米粉) (see note 3)
- 16 pieces raisins
Instructions
- 1
Soak adzuki beans in water enough to cover overnight.
- 2
Drain then put into a pot. Pour in 500ml of water. Bring it to a boil then leave to simmer for about 90 mins until cooked (You may use a pressure cooker/instant pot to reduce the cooking time).
- 3
Put drained beans into a food processor. Add white sugar, dark brown sugar and butter (or lard, coconut oil). Blend on high speed into a fine paste. You may need to add a little water to make blending easier. However, only add as little as necessary.
- 4
Transfer the soft paste into a non-stick pan. Cook over medium-high heat while stirring and flipping constantly to avoid burning. Once the paste becomes dark, dry and holds in shape, remove to cool (please refer to the video for the desired consistency).
- 5
Cut the butternut squash into chunks (skin & seeds removed). Steam for 15 mins until fork tender.
- 6
Put the cooked squash into a food processor. Add sugar and oil. Blend on high speed until it turns into a fine puree.
- 7
Add glutinous rice flour in batches. Run the food processor on medium speed until a dough forms. It should be very soft but not sticky. Depending on the water content of the cooked squash, you may not need to use all the flour suggested in the recipe, or you may need to add a little more. Please feel free to adjust accordingly.
- 8
Divide the dough into 16 equal pieces. Then shape each into a ball. Repeat the same procedure to make 16 balls with the red bean paste.
- 9
Flatten one dough ball into a disc. Place a piece of filling in the middle. Gently push the edge of the dough upwards to cover the filling and seal completely.
- 10
Use the spine of a butter knife to create indentations all around to imitate a pumpkin. Then insert a piece of raisin on top as the “stem”(please refer to the video below).
- 11
Lay the assembled cakes in steamer baskets lined with parchment paper (or brushed with a thin layer of oil if using metal/plastic steamer baskets).
- 12
Bring water to a boil in a wok/pot, place in the baskets. Cover and steam for 10 mins over medium-high heat.
- 13
When cooked, leave the cakes to cool in the baskets for 5 mins then serve (Otherwise, they are very sticky to touch). These pumpkin cakes can be served warm or at room temperature.
- 14
You may keep them in the fridge for 3 days or in the freezer for 2 months.
- 15
Reheat refrigerated or frozen pumpkin cakes in the steamer until they become soft again.
- 16
Make ahead: Lay assembled, uncooked pumpkin cakes on a tray lined with parchment paper. Put into the freezer. Once completely frozen, transfer them into an air-tight bag/container. Store in the freezer for 2 months. Steam them without defrosting for 15 mins.