Japanese Cheesecake チーズケーキ
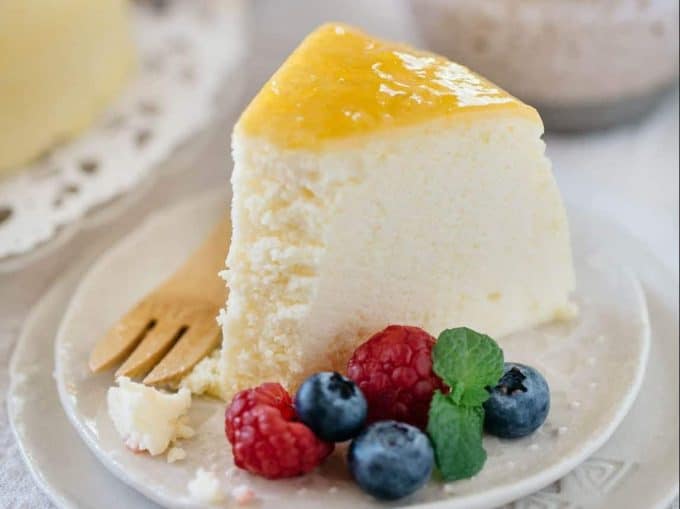
The best ever amazingly fluffy and jiggly Japanese cheesecake recipe with step by step photos and instructions, troubleshooting and tips.
- Prep time
- 45 min
- Cook time
- 2 hr 15 min
- Yield
- 8 servings
- Difficulty
- HARD
Ingredients
Quantities are shown as originally provided.
- 7oz/200g Philadelphia cream cheese
- 4 egg yolks
- 0.7oz/20g caster sugar (( 1 tbsp + 1 tsp))
- 3.4floz/100ml heavy cream (Whipping cream) ((1/3 cup + 1.5 tbsp))
- 3.4floz/100ml milk ((1/3 cup + 1.5 tbsp))
- 1 tbsp lemon juice
- 2 tsp 1/2 lemon lemon zest (I finally bought microplanebrand zester. It only zests the yellow part of the skin. Try not to use the white part as it gives an astringent taste)
- 1.4oz/40g plain flour ((1/3 cup))
- 0.35oz/10g corn starch ((4 tsp))
- 4 egg white (from the 4 eggs’ yolks separated from. Egg white all together weighed approximately 120g)
- ¼ tsp cream of tartar
- 2.1oz/60g caster sugar ((4 tbsp))
- 1oz/30g apricot jam ((2 tbsp))
- 1 tbsp water or Brandie
Instructions
- 1
Leave the cream cheese at room temperature to soften. *1
- 2
Prepare the 7 inch (17cm) in diameter and 3 inch (7.5cm) tall round cake pan. Spread unsalted butter thinly and line the bottom with baking paper and set aside in fridge. *2
- 3
Sift the flour and corn starch and set aside
- 4
Separate eggs to yolks and whites. Refrigerate the egg whites in a bowl. *3
- 5
Stir the softened cream cheese with a wooden spatula to make it a smooth cream texture.
- 6
Combine milk and cream. Add the milk and cream mixture a little bit at a time and mix well each time.
- 7
Add sugar and add egg yolks one at a time and mix well each time.
- 8
Sieve the cream cheese mixture into a large mixing bowl to avoid any lumpy bits.
- 9
Add lemon juice and lemon zest to the mixture and mix well. *4
- 10
Sift the flour and cornstarch into the egg yolk and cream cheese mixture and combine them.
- 11
Start to preheat the oven to 338°F(170°C) degrees Celsius. * 5
- 12
Make the meringue. Set the stand mixer and whip the egg whites till large bubbles form. Add the cream of tartar and whip.
- 13
Add 1/3 of the caster sugar in 3 to 4 different times and whip the egg whites each time the sugar is added. Whip till soft peaks form (when the stand mixer’s attachment is lifted, the white egg peak bends a little bit).
- 14
Remove the mixing bowl from the stand and hand whip to stabilize the meringue form.
- 15
Fold 1/3 of meringue into the cream cheese mixture with a whisk carefully trying not to break the fine meringue form. Repeat the same one more time.
- 16
This time, add the cream cheese mixture into the meringue bowl and fold all together carefully with a spatula.
- 17
Pour the mixture into a prepared round cake tin. Fill the tin about 0.6 inch (1.5 cm) down the rim of the tin, tap a couple times on a kitchen bench to release the air bubbles. *6
- 18
Place and bake it in a water bath in the preheated oven. Turn the oven temperature down to 320°F (160°C) and bake for 20 minutes. *7
- 19
After baking on 320°F (160°C) for 20 minutes, turn the temperature down to 284°F (140 °C) and bake for a further 55 minutes. (it took about 20 minutes at my oven temperature to get down to 284°F (140°C)
- 20
Turn the oven off after its baked in 284°F (140°C) for 55 minutes. Leave the cake inside the oven for a further 30 minutes to cool the cake down gradually.
- 21
After leaving the cake for 30 minutes with the oven turned off, remove the water bath and leave the oven door slightly open and let it continue to cool down gradually.
- 22
Place the cheesecake (still intact in the round tin) in an airtight container and refrigerate overnight. *8
- 23
Remove the cake from the tin.
- 24
Glaze the top of the cheesecake with apricot jam glaze with a brush and slice it with a sharp and warm knife to serve.