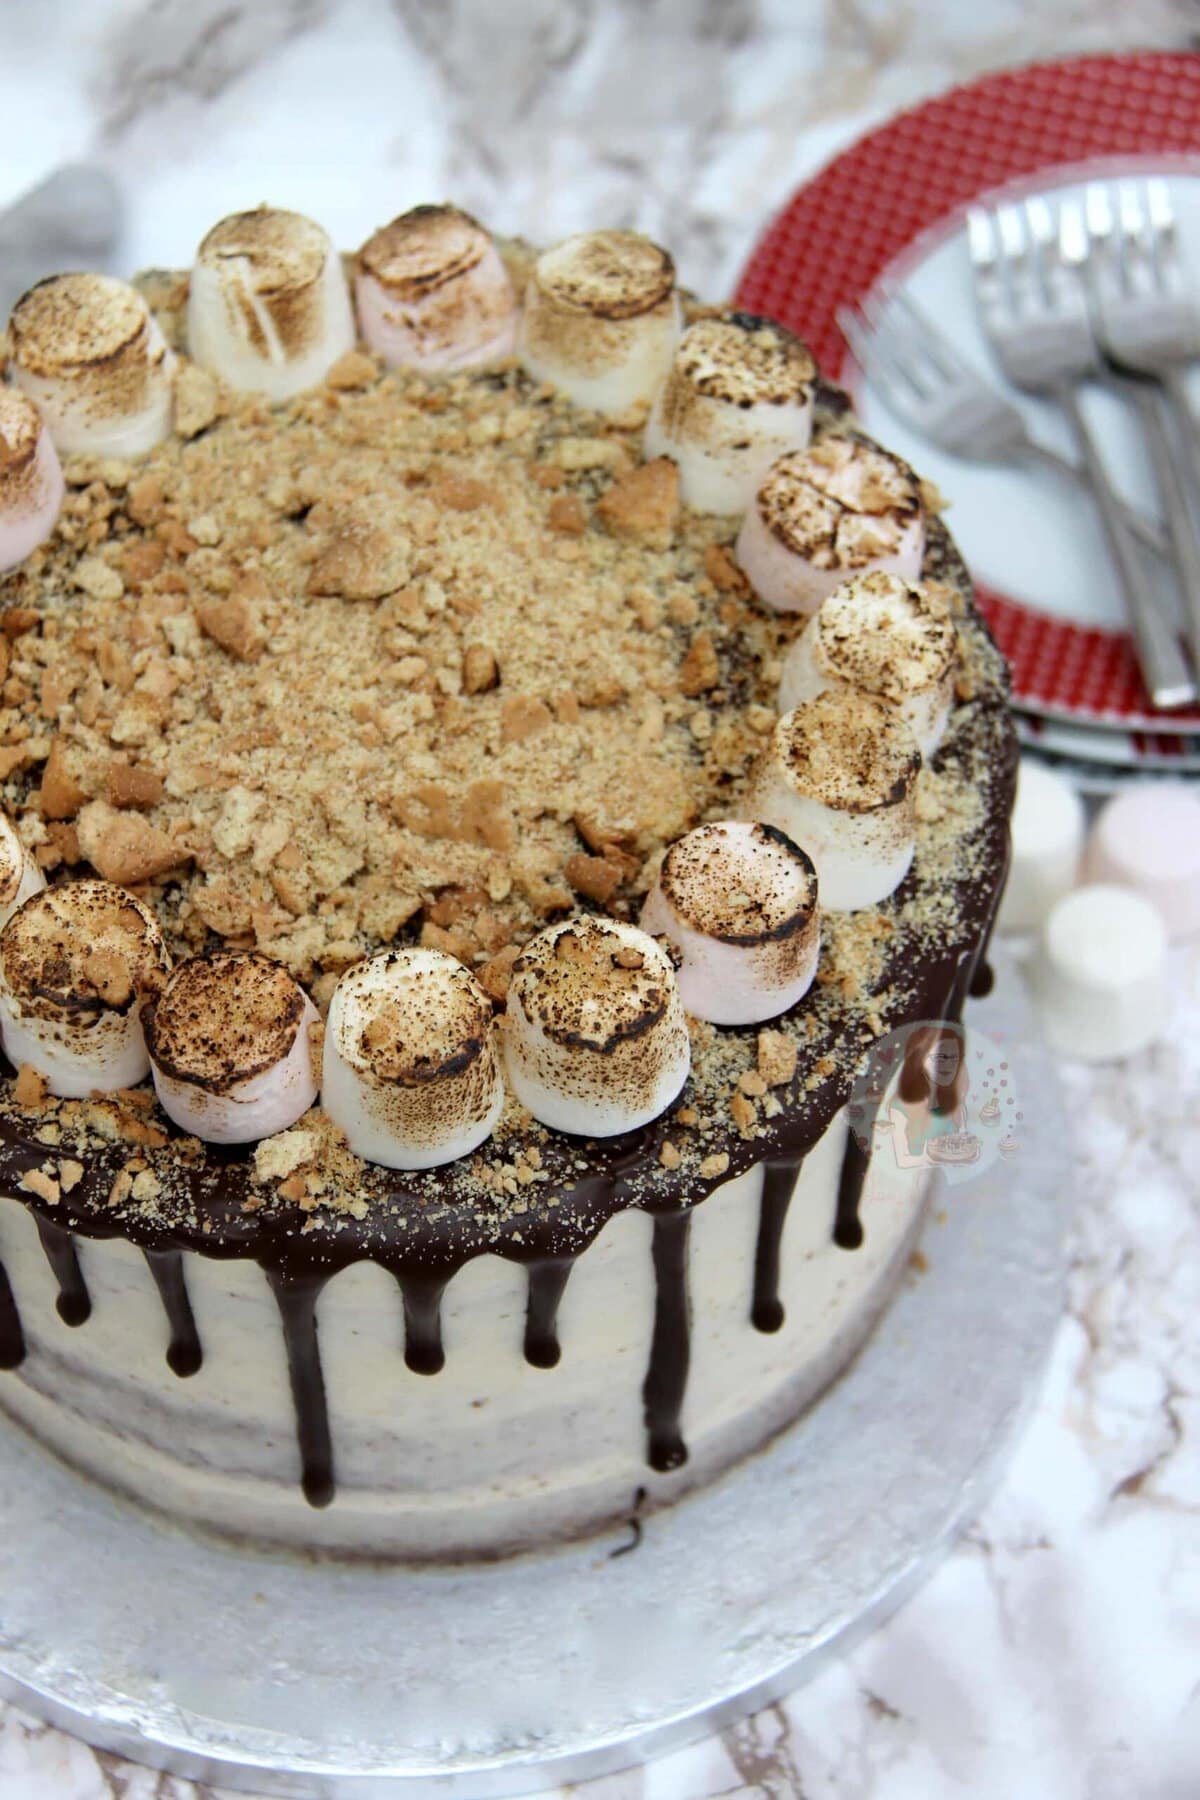
S'mores Drip Cake!
Chocolate Sponge, Marshmallow Fluff Buttercream Frosting, Toasted Marshmallows and Crushed Biscuits make the ultimate S’mores Cake to end all S’mores.
- Prep time
- 20 min
- Cook time
- 30 min
- Yield
- 16 servings
- Difficulty
- HARD
Ingredients
Quantities are shown as originally provided.
- 400 g Unsalted Butter
- 400 g Light Brown Sugar
- 8 Medium Eggs
- 325 g Self Raising Flour
- 75 g Cocoa Powder
- 2 tsp Baking Powder
- 400 g Unsalted Butter ((room temp))
- 850 g Icing Sugar
- 1 tsp Vanilla Extract
- 1x tub Marshmallow Fluff ((200g))
- 150 g Dark Chocolate
- 1-2 tbsp Vegetable/Sunflower Oil
- Marshmallows
- Biscuit Crumbs
Instructions
- 1
Heat the oven to 180C/160C Fan and line three 20cm/8inch cake tins with baking parchment – leave to the side.
- 2
In a stand mixer, beat together the butter and light brown sugar until light and fluffy.
- 3
Add in the flour, cocoa powder, beaten eggs, baking powder and beat again briefly till combined – try not to over beat the mixture!
- 4
Divide the mixture between the three tins and smooth it over – bake for 25-30 minutes until a skewer comes out clean when poked, and when the cake springs back.
- 5
Once baked, leave the cake to cool in the tin for 10 minutes, and then remove and leave to cool fully on a wire rack. If the cake has domed slightly, leave the cake to cool upside down to flatten it slightly.
- 6
In a stand mixer, beat the room temperature butter with an electric mixer until it is smooth and loose and then beat in the icing sugar 1/3 at a time until its fully combined.
- 7
Keep beating the buttercream for a few minutes so it starts to get fluffier and lighter.
- 8
Add in the tub of Marshmallow Fluff and beat again – till wonderfully combined!
- 9
Once the cakes are cooled, put the first layer on the serving plate spread some of the buttercream onto the top of the first layer, add the second cake on top, and then top again with some of buttercream and then add the final sponge layer. Only use about 2-3 tbsps of buttercream per layer so that you have enough to decorate with!
- 10
With the leftover buttercream, as you can see, I covered the sides (and top) too! Do a first layer of around the edge and top using a large metal scraper and refrigerate for 10 minutes.
- 11
Repeat again with a slightly thicker layer of buttercream. I slather it on all over using an offset spatula and then run the metal scraper round until its smooth. You put more on compared to what will stay on because when you smooth it over, you will naturally scrape some back off again.
- 12
Refrigerate the cake for about 20 minutes (if you can) to firm it up.
- 13
Once finished, melt the Dark Chocolate in a heatproof bowl until melted. Add in 1tbsp of oil and beat till smooth, continue to add oil till you get to a drippy consistency. I use 2tbsps of Oil for Dark Chocolate drips, but some chocolates might need more or less.
- 14
Using disposable piping bags, pipe it around the edge of the cake, edging over slight bits to create the drip. You don’t need to use too much per drip as it’ll drop quite far down by itself! Fill in the top in with the rest of the chocolate so the top is also covered.
- 15
Add some larger marshmallows around the edge of the top of the cake and toast them slightly with a blowtorch for a bonfire marshmallow effect. Crush over some biscuits and leave the chocolate to finish setting! Enjoy!